Looking for something different to pack your child’s lunch with for school? This tasty combination will have them asking for more!

Food Safety: Back to School Food Safety
It’s time to get ready for back to school! While you start planning on what to put inside you or your child’s lunchbox, don’t forget to keep that food safe. According to the CDC, almost 50% of the Salmonella infections that happen each year happen to infants and school-age children. Keeping food safety in mind while preparing and packaging lunch boxes can greatly reduce food poisoning. Here are a few tips that can help make sure that food is packed safely:
 Clean, Cook, Separate, Chill:
- Clean: If you’re making lunch the night before, be sure to wash your hands and use clean cutting boards, utensils, and countertops. Making lunch on the same surfaces you used to prepare raw meat or poultry for dinner may result in cross-contamination and lead to Salmonella-related illnesses.
- Separate: Use one cutting board for fresh produce and a separate one for meat and poultry.
- Cook: Cook foods to the right temperature using a food thermometer.
- Chill: If the lunch contains perishable food items like luncheon meats, eggs, and yogurt, make sure to pack it with at least two cold sources (e.g. freezer packs and frozen water bottles).
Easy Tips to Pack a Safe Lunch:
- Frozen juice boxes can also be used as freezer packs. By lunchtime, the juice should be thawed and ready to drink!
- Perishable food can be unsafe t o eat by lunchtime if packed in a paper bag. Use an insulated box or bag instead.
- Children should wash their hands for 20 seconds with warm soapy water before eating. Have them sing the ABCs twice while washing if they sometimes finish early.
- If possible, your child’s lunch should be stored in a refrigerator. But leave the lid of the lunchbox or an insulated, soft-sided bag open in the fridge so that cold air can circulate and keep the food cold.
- If you’re packing a hot lunch, like soup, chili, or stew, use an insulated container to keep it hot. Fill the container with boiling water, let it stand for a few minutes, empty it, and then put in the piping hot food. Tell your child to keep the insulated container closed until lunchtime to keep the food hot- 140º or above.
- After lunch, discard all leftover food, used food packaging, and paper bags. Do not reuse packaging because it could contaminate other food.

Download this food safety infographic from www.FoodSafety.gov and keep it handy to help make sure that you or your child are eating a lunch that is safe as well as healthy!

Extra Easy Hummus
Homemade hummus is simple to make and easy to enjoy! Try our recipe with vegetables, toast, chips, or spread on a sandwich. 

Ingredients
- One 15-ounce can of unsalted garbanzo beans drained liquid reserved
- 1 garlic clove crushed
- 2 teaspoons ground cumin
- 1/4 teaspoon salt
- 1 Tablespoon olive oil
Servings: 1/4 cup servings
Units:
Instructions
- In a blender or food processor combine all ingredients.
- Blend on low speed, gradually adding reserved bean liquid until desired consistency is achieved.
Recipe Notes
Mediterranean Chicken Sandwich
This Mediterranean Chicken Sandwich is the perfect flavorful lunch. Prep the ingredients at the beginning of the week and assemble for lunch each day!
Get the Extra Easy Hummus recipe here!

Ingredients
- 4 flatbreads
- 1/2 cup Extra Easy Hummus
- 4 4-oz grilled chicken fillets cooked
- 1/2 cup fresh spinach leaves
- 1 red onion sliced into rings
- 1/2 cup feta cheese, handful Greek olives *Optional
Servings:
Units:
Instructions
- Begin by heating each flatbread just until warm. Spread 1/4 of the hummus on each flatbread.
- Place chicken,spinach, and red onion on top of the hummus. If desired, sprinkle feta cheese and Greek olives on top.
Recipe Notes

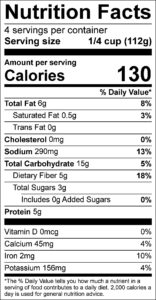
*Nutrition label reflects recipe without optional toppings.
Veggie Tots
How do I be more creative with my vegetable game? How do I repurpose leftover vegetables? Our answer: VEGGIE TOTS! Try this fun and tasty recipe at your next meal.


Ingredients
- 2 cups russett potatoes ready to serve
- 2 cups frozen broccoli florets thawed
- 1.5 cups shredded Parmesan cheese
- 1/8 cup grated Parmesan cheese
- 1/2 cup dry bread crumbs
- 1 egg white
- 1 tablespoon Italian seasoning
Servings: servings (4 tots per serving)
Units:
Instructions
Oven Instructions
- Preheat oven to 425F, place oven rack in the middle of the oven and line baking sheet with silicone mat or parchment paper.
- Steam or microwave the potatoes to the point where a fork is easily inserted but its too tough to eat (20 seconds for ready to eat potatoes in microwave)
- Once they are cooked, drain them and set them aside to cool down.
- Then place 2 cups of thawed broccoli florets into your food processor and pulse it until the broccoli resembles coarse rice. (should yield 1 1/2 cups chopped)Measure out 1 1/2 cups of the finely chopped broccoli and transfer into a large bowl.
- Next, pulse the semi-cooked potatoes and 1 1/2 cups of the Parmesan cheese; pulse just enough to break up the potatoes and combine then with the cheese.
- Place the cheese and potato mixture into the bowl with the broccoli.Add seasoning into the large bowl and fold all ingredients with a large spatula to combine all ingredients evenly.
- Then place grated parmesan cheese and panko bread crumbs into small bowl.Form small balls with a 1 tablespoon size cookie scoop or your hands and a spoon with the folded. Once the ball is formed, roll each veggie tot in the grated cheese and bread crumb coating
- Place each veggie tot on the baking sheet, about 1/2 inch apart.Bake 12 minutes, until golden brownRemove from the oven, let cool for 2-3 minutes and enjoy!
Air Fryer Instructions
- Complete instructions 2-8 from the "Oven Instructions" section.
- Preheat the air fryer to 400°F and set the time for 7 minutes.
- Once preheated, place food on the tray/basket making sure not crowd the tots. Spray the top of the tots with non-stick cooking spray.
- Close the air fryer and start the cooking. Halfway through, turn the tots over and spray the tops with non-stick cooking spray and finish the cooking.
- Note: you might have to cook the tots in batches.
Recipe Notes
May use fresh potatoes for this recipe instead of the ready to use russet potatoes.